Search and Find
Add a Photo Gallery Page to WordPress Website
This will tell you how to add a page with a photo gallery to your WordPress website.
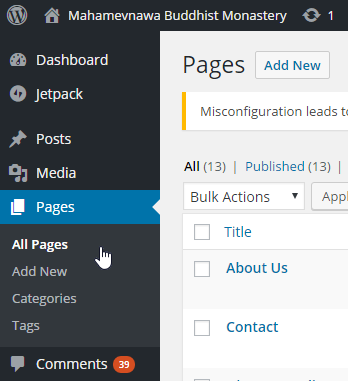
1. Once you are logged in to the back end of the website, on the left-side black menu, select PAGES and then ADD NEW.
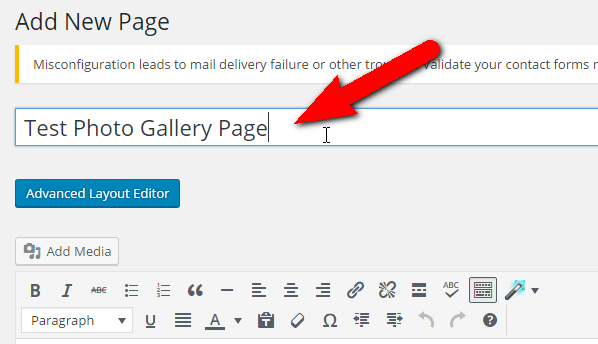
2. This will open the Add New Page window. In the top empty text box enter the title of the page.

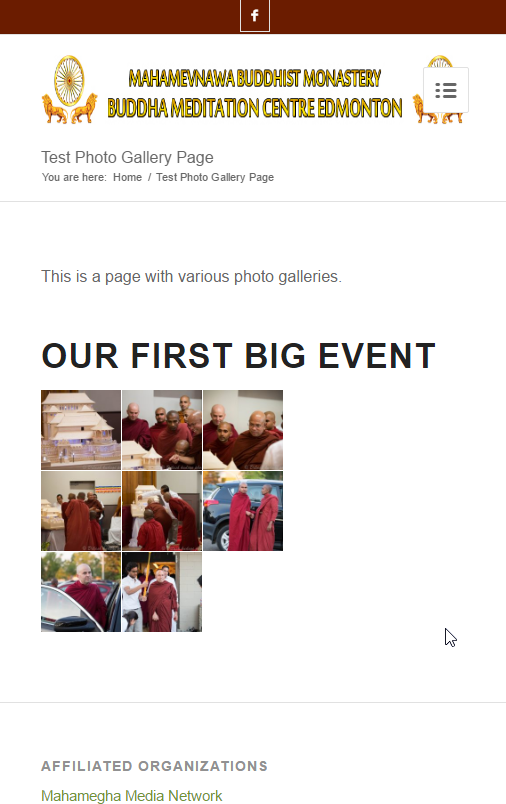
3. In this example, we give the title, “Test Photo Gallery Page”
4. After you press enter, WordPress will give the page a web-address. You see this below the title. It is usually made up of the title of the page seperated by hyphens. The address for this page is http://mahamevnawaedmonton.com/test-photo-gallery-page/
5. In the text area, enter some text
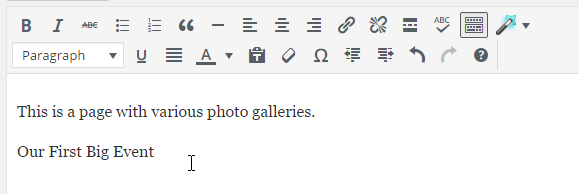
6. Place your cursor in the second line and then click on the word PARAGRAPH to drop down the style menu. Select HEADING 1.
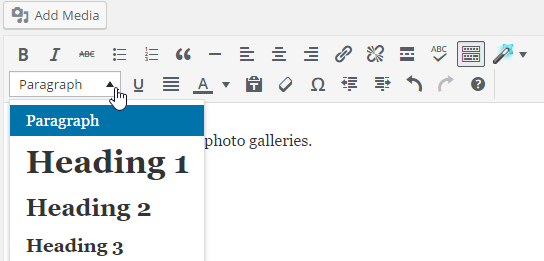
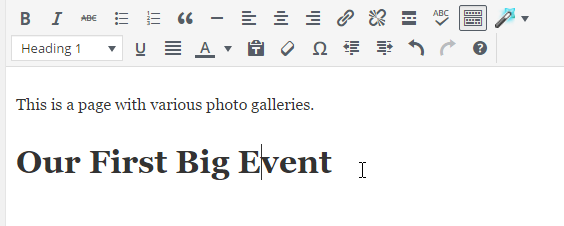
7. You will then see that this line is in the heading style. This is the same way Microsoft Word works.
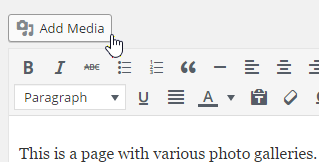
8. Now we will add the gallery. Put your cursor on a blank line and then click on the ADD MEDIA button
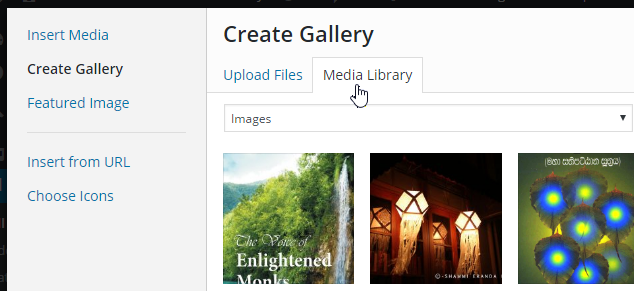
9. This will bring up the Insert Media window. On the left, click on the CREATE GALLERY link.
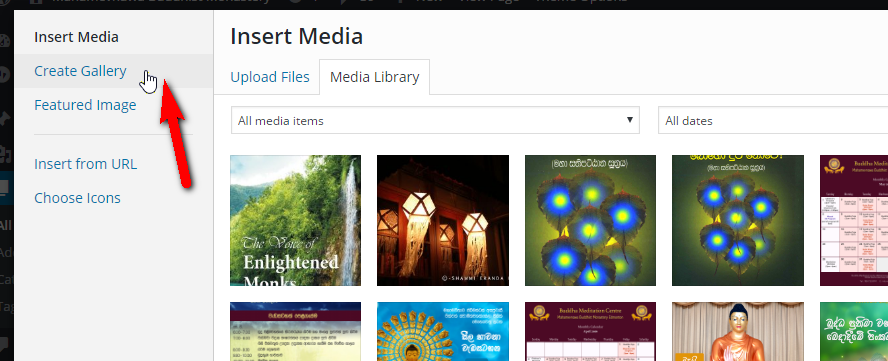
10. Then you will see the Creat Gallery window. First we will add images that are already in the media library.
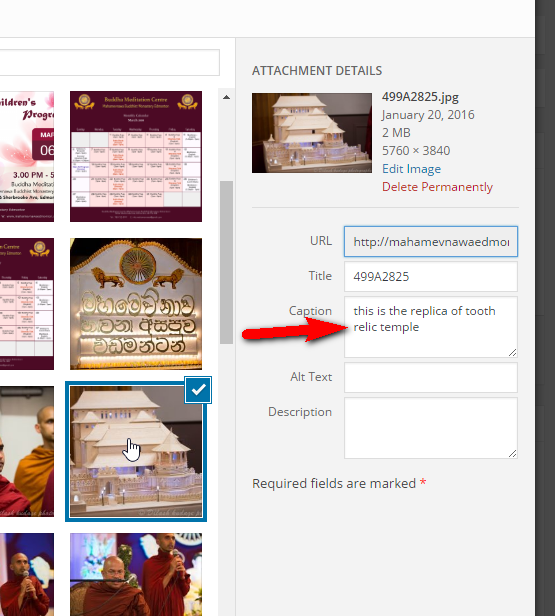
11. If your internet connection is slow it may take some time for the media library to load. You can then select all the images you want to include. The last image selected willl be hightlighted in blue. But you will see that all selected have a check box. You will also see that the selected images appear along the bottom off the window. (see red arrow)

12. You will also notice that as you select images, an ATTACHMENT DETAILS section appears on the right. If you want you can type a caption as you select them. You can also add captions later.
13. If you need to upload files from your computer, select the UPLOAD FILES tab. Then either drag and drop files into the window or click SELECT FILES and then choose the photos you want to upload. After you do this, it will take you back to the media library with the photos already selected.

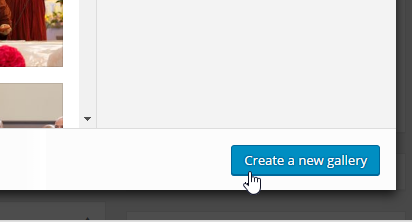
14. When you have selected all the images you want to include, click CREATE A NEW GALLERY. You can add, remove, and reorder images later.
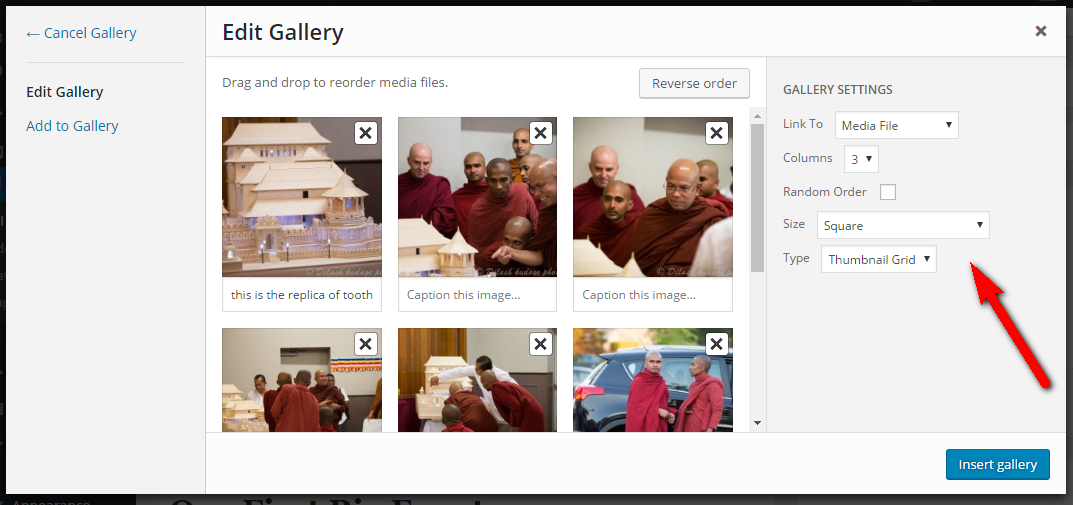
15. Now you will be in the EDIT GALLERY window. On the right side (see red arrow below) you can change the gallery settings. Change your settings to what you see in the image, or whatever you like.
Here you can also
- delete images by clicking on the X
- arrange image by dragging and dropping
- add captions by typing in the area below each image.
16. When you are done, click on the INSERT GALLERY button in the lower right corner.
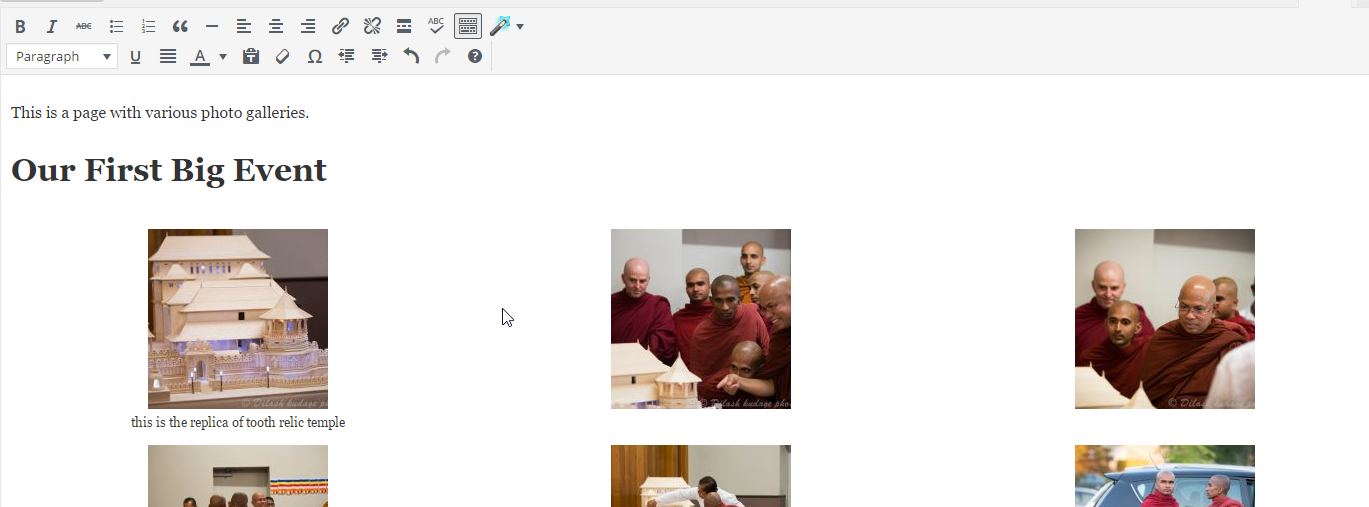
17. Now you will be in the regular editor. You will see the images inserted into your page. It may look different here than it will when published.
18. To make changes to the gallery, click anywhere in the area of the images. The area will turn gray and you will see a small toolbar pop up. Click on the pencil icon to edit the gallery.
19. If you want to add images, click on ADD TO GALLERY. follow the same steps as above.
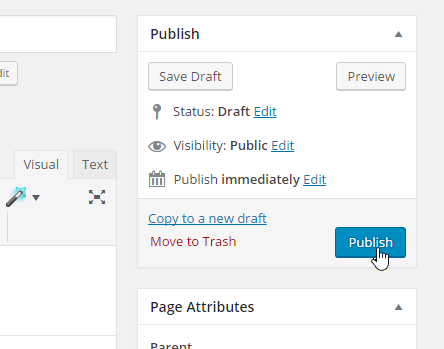
20. When you are happy with the gallery, click the blue PUBLISH button on the right side.
21. After you do this, you will see a small message at the top of the screen that says “Page draft updated. Preview page”. You can either click on the PREVIEW PAGE link or the full web address link below the title.
Congratulations! You have successfully
- Created a new page
- Added a heading on that page
- Inserted a gallery
- Added images to the gallery
- Publlished the page.