Search and Find
Mailchimp—Create a New Campaign (Email)
If you want to copy a previous email, read this article.
1. Log in to Mailchimp and click “Create Campaign”.

2. Click on “Create an Email.”

3. Enter a name for your campaign. Only you will see this name. The mail subject is something different We will set that later.
Click “Begin.”

Recipients
Now you will see a screen that shows you the four steps to setting up your email that looks like this:

4. First click “Add Recipients“. Then click the dropdown that says “Choose a list.”

5. Next you have to decide if you will send it to the whole list or part of the list. Your list may be divided by language with a group or segment for Sinhala. If you just want to send to a segment, drop down that list and choose one. Generally English emails go to the whole list. Then click “Save“

6. Now click “Add From.” The information may already be filled in. This is the name that will appear in the “From” filed along with the email address. This will probably be an email that starts with info@. When you are done, click “Save“.

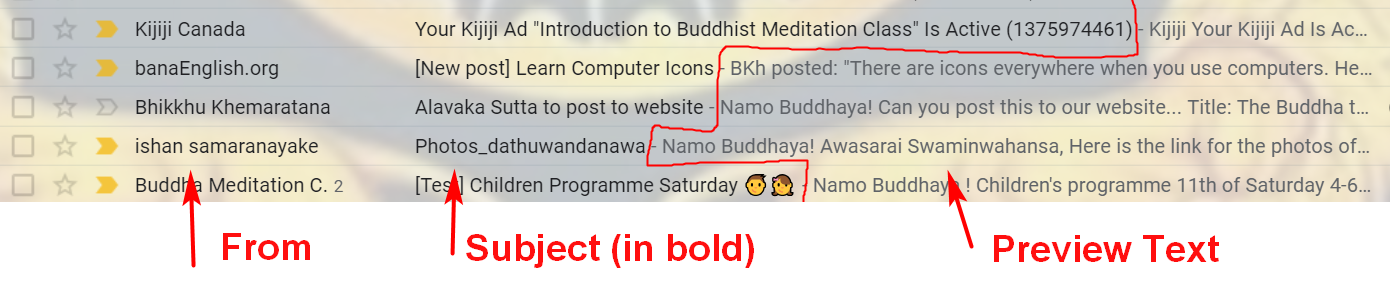
7. Now you enter the subject. The Preview text is what sometimes appears when looking at a list of emails.

For Example:
If you like you can add an emoji by clicking on the smiley face at the end of the field.
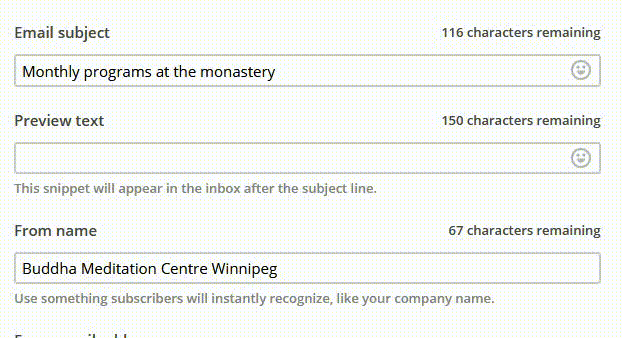
When you are done, click “Save“.
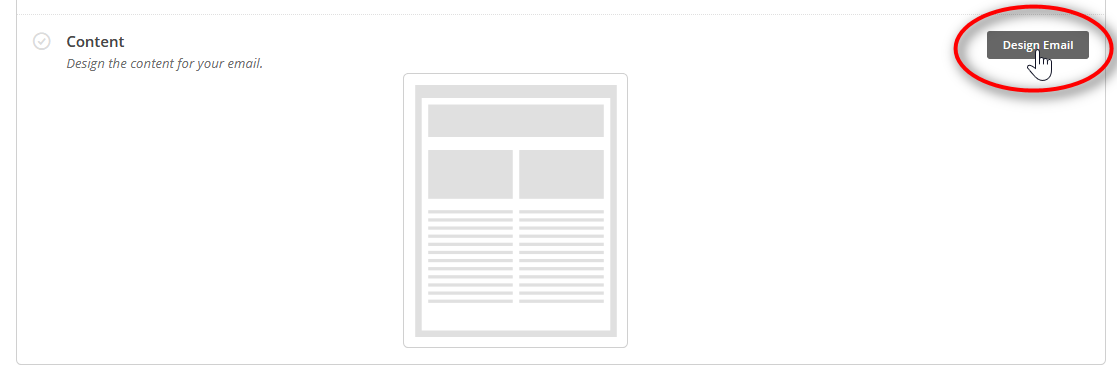
#. Next you are ready to actually design the email. Click on “Design Email”
10. You can choose to start with a blank layout or copy an old Campaign.
Using a blank layout:

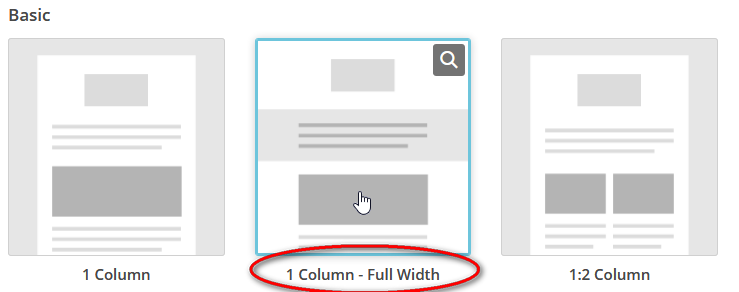
Now choose the layout you want. “1 Column – Full Width” is good.
Copy a previous campaign:

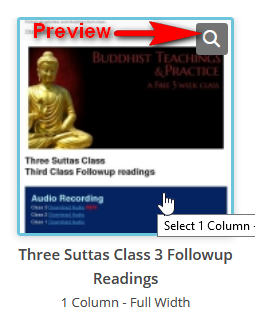
If you want to see what the layout will look like, hover over the image and then click the magnifying glass to preview.
When you have the template you want, click “Next” at the bottom right of the screen.

Design
12. Now you are in the design area. On the left is the preview window. On the right are widgets/Elements that you can use. There will be some sample widgets already added on the left. You can click on them to edit.

All you have to is drag the elements from the right to the left.

When you click in the preview side, the right side becomes an editing window:

When you are done editing each element, click “Save and Close”.

NOTE: Be sure to double check every part of the body of the e-mail to make sure that it is correct and doesn’t have old information.
Preview
When you are finished you can send yourself a test email. At the top of the screen, click “Preview and Test.” Then click “Send a test email”.

Then you enter your email address and click “Send Test”.

Then check your email account and test all the links.
Last step: Confirm and send
When you are completely finished, click “Next” in the bottom right corner.

Now you will be back to your main screen. You can change anything you have done. If you are ready, click “Send.”

Then on the new window, click “Send Now”.
BE CAREFUL!!!! Once you press this, you cannot stop the sending.

Then you’re done!
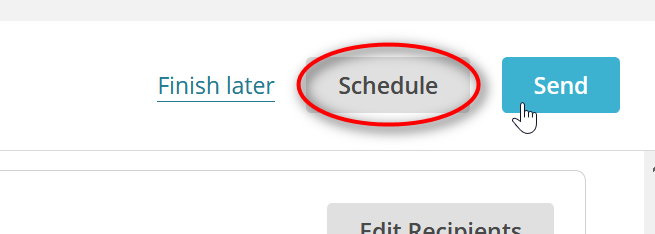
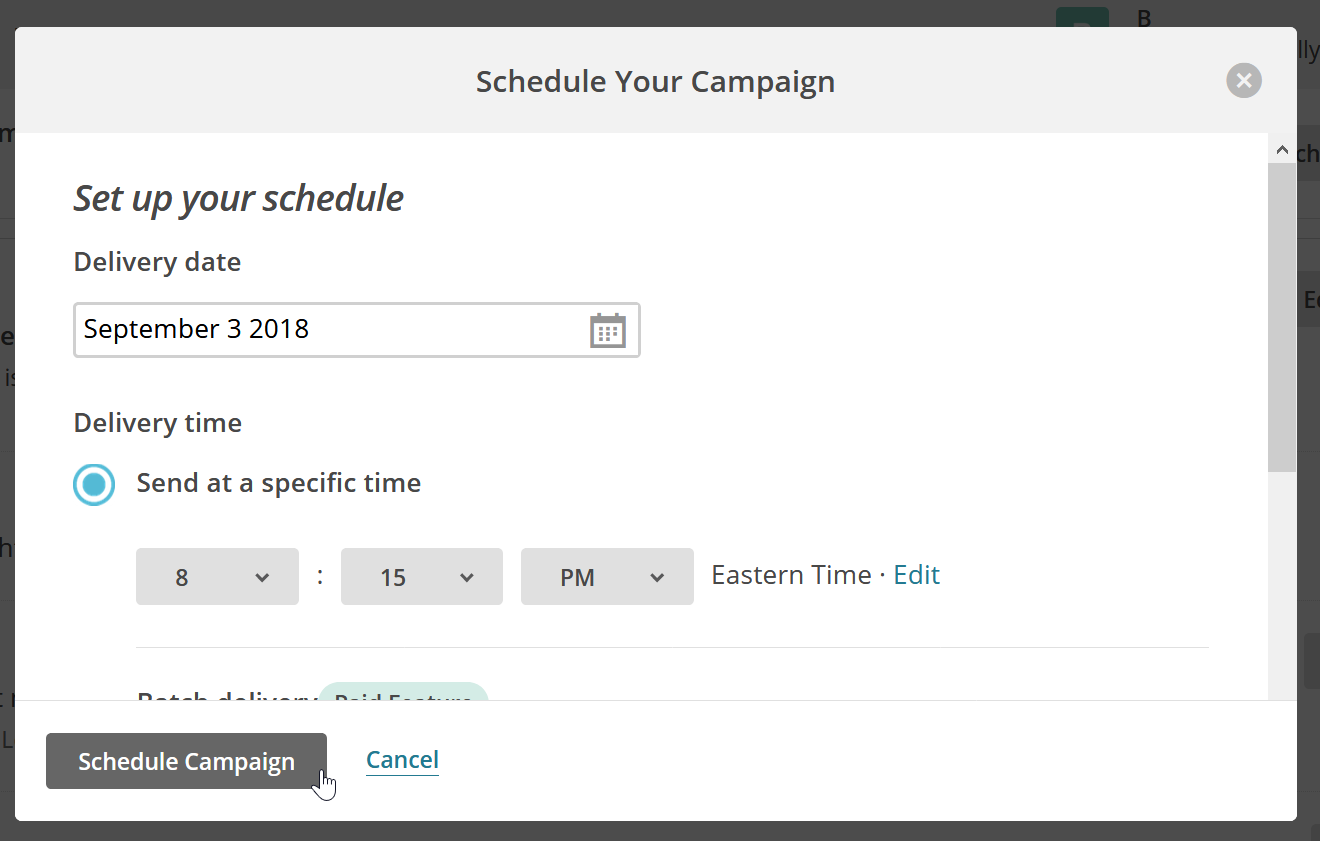
If you want to schedule the post, click “Schedule.” Choose when you want to send it and then click “Schedule Campaign.”
Then you’re done!!
If you are not ready to send or schedule, select “Finish Later.”
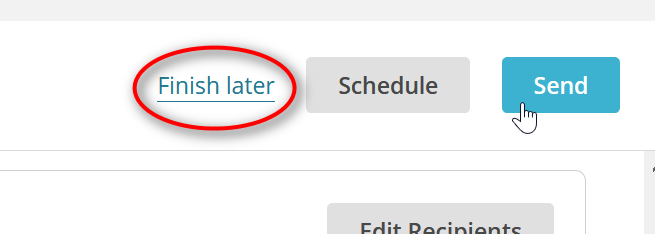
Then later when you want to finish, YOU MUST CLICK ON DRAFTS. DO NOT CLICK CREATE CAMPAIGN AGAIN!!!

Then you can start back where you left off.